workshop-nodeconfeu2018
Bluetooth Workshop
In this workshop we’ll figure out how to use Web Bluetooth to interact with other devices - but also how to use Espruino on embedded devices to develop our own Bluetooth-enabled hardware.
Step 1 - Connecting
The first step is to make sure you can connect to your Badge via Web Bluetooth. We’ll do this with the Espruino IDE - once connected you’ll be able to fully reprogram your badge if you want to.
- First, go to http://www.espruino.com/ide in an up to date Chrome Web Browser
- Click the connection icon in the top left
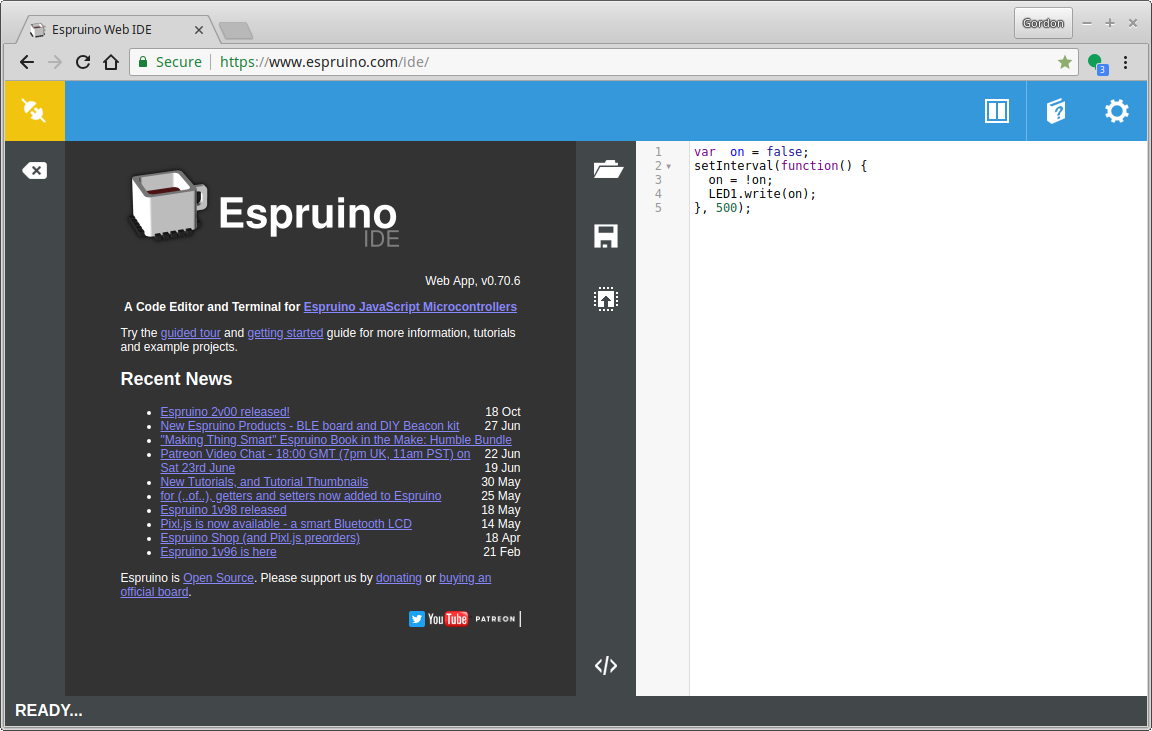
- You should see
Web Bluetooth- if you don’t, check out Espruino’s Guide and if there’s nothing useful there, seek help. We have a few USB dongles that’ll work on older Macs and PCs.

- Now it’s time to set up the badge so you can connect to it. Press a button on the left-hand side to bring up the menu.
- Choose
Make Connectable
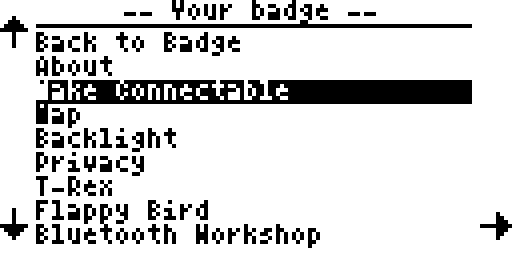
- Now you should see the following screen - note the Name shown on-screen.
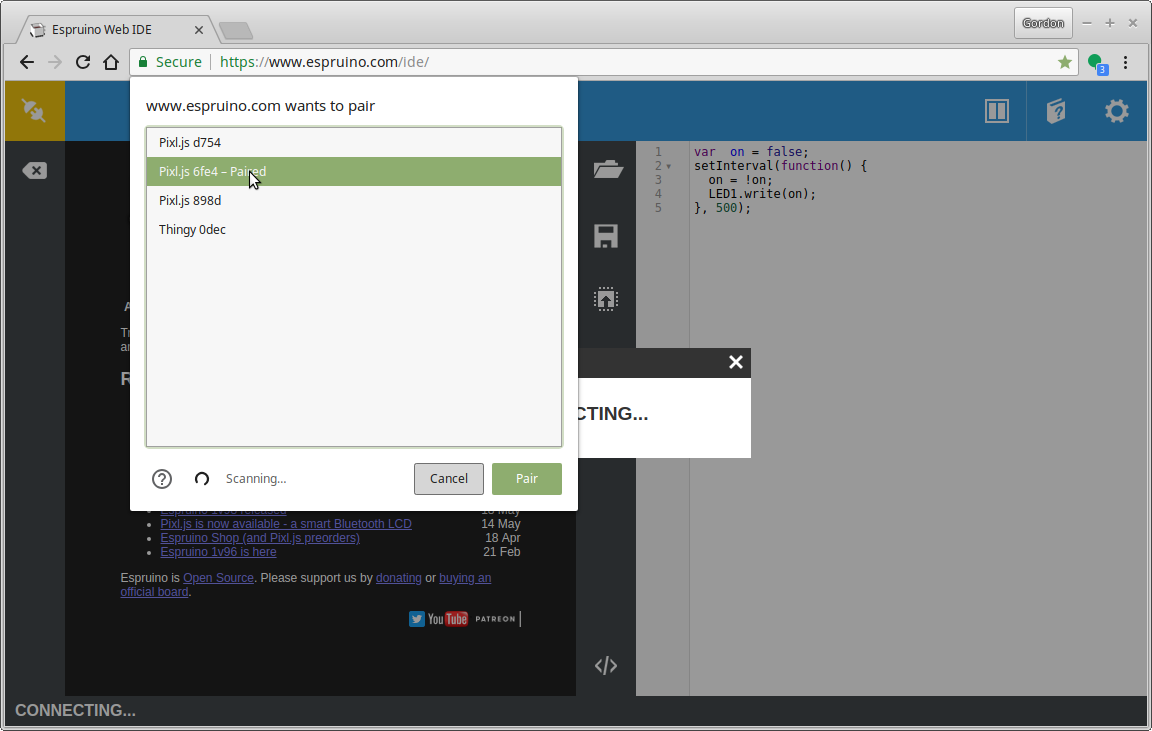
- Click the connect icon in the top left of the IDE again, and click
Web Bluetooth - You should see a bunch of devices - choose the one with the name as it is written on your badge’s screen:
- Now you should be connected!
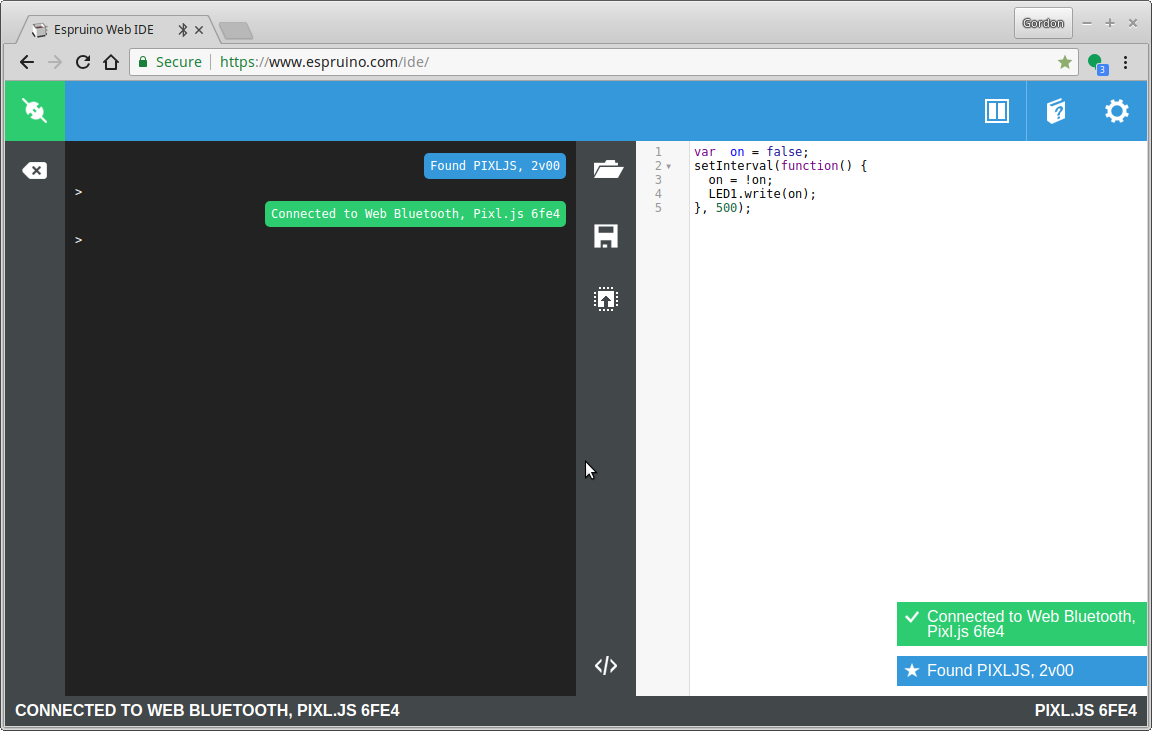
- On the left-hand side of the IDE is a REPL where you can enter commands. There’s Tab Completion which may help you.
- On the right-hand side there’s an editor. Ctrl-Space will autocomplete, including documentation on the various functions available. To upload code from the right-hand side, just click the ‘Upload’ button right in the middle of the IDE.
Backlight Hacking
Now you’re connected, you could try customising your Badge’s backlight…
- Go into the Web IDE’s settings (top right) and under
Communicationsturn offReset before sendand ensureSave on Sendis set toTo RAM(this will stop you accidentally overwriting your badge’s code). - Copy the following code in to the right-hand side of the IDE:
Badge.patterns.green=()=>{
  var n=0;
  return [()=>{
    n+=50;
    if (n>1536)n=0;
    NC.ledTop([0,Math.max(255-Math.abs(n-1024),0),0]);
    NC.ledBottom([0,Math.max(255-Math.abs(n-1384),0),0]);
    NC.backlight([0,Math.max(255-Math.abs(n-640),0),0,
                  0,Math.max(255-Math.abs(n-512),0),0,
                  0,Math.max(255-Math.abs(n-384),0),0,
                  0,Math.max(255-Math.abs(n-256),0),0]);
  },50];
};
// Run the pattern right now
Badge.pattern("green");
- Now click the ‘upload’ button (in the middle of the screen) - this should now make your badge light up with a green animation.
So what’s going on? The badge’s lights are controlled by arrays of
blue, green, red values, all of which are between 0 and 255.
ledTop and ledBottom are just one colour, so take 3 elements.
However the LCD backlight has 4 separate LEDs, so it has 12 elements,
[B1,G1,R1, B2,G2,R2, B3,G3,R3, B4,G4,R4] for the 4 LEDs.
- Have a play around with different code - you can use
E.HSBtoRGBto get different hues easily - check out the Badge’s code for some examples. - When you’re happy with the pattern, you might want to save it so that it’s
restored even after power off. Wrap your code as follows, and click
uploadagain:
require("Storage").write(".boot0",`
Badge=global.Badge||{};
Badge.patterns=Badge.patterns||{};
// --------------------------------- Your code
Badge.patterns.green=()=>{
  var n=0;
  return [()=>{
    n+=50;
    if (n>1536)n=0;
    NC.ledTop([0,Math.max(255-Math.abs(n-1024),0),0]);
    NC.ledBottom([0,Math.max(255-Math.abs(n-1384),0),0]);
    NC.backlight([0,Math.max(255-Math.abs(n-640),0),0,
                  0,Math.max(255-Math.abs(n-512),0),0,
                  0,Math.max(255-Math.abs(n-384),0),0,
                  0,Math.max(255-Math.abs(n-256),0),0]);
  },50];
};
Badge.defaultPattern = "green";  // <--------- pattern name here
`);
- Now you can type
load()to have the badge reload everything from flash memory, along with your pattern!
For making badge apps, and other stuff, check out the Nodeconf EU Badge’s documentation and examples.
Other stuff…
If you’re interested in playing with Espruino further…
- Try the simple on-screen tutorial by clicking the book in the top right of the IDE,
followed by
Tutorial - See the normal Espruino intro at http://www.espruino.com/Quick+Start+Code
- Check out the Nodeconf EU Badge’s documentation and examples
- Play around with the Graphics library - the badge comes with a built-in Graphics class called
g. You just need to callg.flip()to update your changes to the LCD display. - Try some of Espruino’s Pixl.js Tutorials/Code, for example the Morphing Clock
Web Bluetooth Steps…
If the IDE at http://www.espruino.com/ide worked for you then great, you’re sorted!
If it didn’t and it couldn’t be made to work, but you can get Node.js and Noble working then you can use the Web Bluetooth wrapper for Node to follow along with more or less the same code (you can also use the Espruino command-line tools to communicate with your badge.